

24 Mar What Does the Asphalt Paving Process Look Like?
If you have a construction project that involves asphalt paving in Orlando, you’re probably wondering what the entire process looks like. In this short guide, we will provide a step-by-step overview of the asphalt paving process, starting from the preliminary demolition all the way to the finalized, smooth, finished surface.
1. Removing the Existing Pavement
The first step of the asphalt paving process involves the demolition of the existing surface, whether it is made of concrete, pavers or asphalt. This is done using heavy machinery, which can include everything from bobcats to front loaders and forklifts. If the removable surface is made of asphalt, the debris may be reusable—this process, known as pavement milling, can reduce the material costs of the project.
2. Grading and Sloping the Location
With a clean surface, it’s time to prepare the location for water drainage. This is done using laser-guided transits and automated graders. Without this crucial step of the process, the asphalt would be very vulnerable to water damage, which could cause potholes, heaving or cracks.
3. Preparing the Sub-base
The sub-base ensures that the new pavement is stable and resistant to the damage that can be caused by the regular thawing and freezing cycles of colder climates. Without a proper sub-base, the asphalt will be soft, malleable and very low quality.
4. Proof Rolling the Sub-base and Undercutting if Necessary
Once the sub-base is in place, some companies will use a technique known as the proof roll. This technique involves using a piece of very heavy machinery to test the sub-base and check if it is ready to support the new layer of asphalt. The sub-base may be tested under weights that exceed 72,000 pounds, and if the test reveals soft spots, the contractor will perform undercuts. In other words, the contractor will dig underneath the sub-base to a depth of 2-3 feet and replace the underlying soil with a stronger aggregate material. Some companies may use a geo-grid instead of performing an undercut, which is a cheaper option that requires digging to a depth of 16 inches and laying down a grid that binds the base materials together.
5. Adding the Binder Layer
The binder layer comes next. This layer is composed of an aggregate material mixed with oil, and it is a strong and very durable substance that will provide the consistency for the new asphalt surface.
6. Installing the Asphalt
With all the supporting structures and materials in place, it’s time to add the top layer of asphalt. This top layer is composed of small aggregate, oil and sand, and it provides a smooth, jet black finish that makes for an excellent road, driveway or parking lot.
7. Adding Butt Joints
The second-to-last step of the process connects the new asphalt surface to existing roads, parking spaces, etc. This is done using butt joints, which is a fairly complex undertaking in its own right. It is important to ensure that these joints fit in seamlessly with the existing roads, and that they have the proper grading and water run-off.
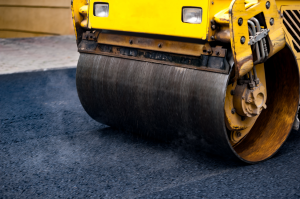
8. Adding the Finishing Touches – the Final Roll
With the asphalt and joints neatly in place, the surface of the asphalt is smoothed and compacted using a roller. This will even out any small bumps in the aggregate and leave no stone pointing out of the surface of the asphalt.
To conclude, this is generally what you can expect from the asphalt paving process in Orlando. If you have any questions or concerns, please do not hesitate to contact All Asphalt Services today!
Sorry, the comment form is closed at this time.